

Key Takeaways
Understanding the Scope Before You Start
Bathroom remodels span a wide spectrum - from a simple fixture swap to a full gut renovation that touches every surface and system. Misreading the scope upfront is the most reliable way to blow a budget and a schedule. Before demolition begins, map out exactly which of these three categories your project falls into:
- Cosmetic refresh: Paint, new hardware, mirror, lighting fixture replacement. No permits typically required. If this is your goal, see our targeted upgrade guide before committing to a full remodel.
- Partial remodel: New tile, vanity, toilet, or tub-to-shower conversion without moving drain or supply locations. May require permits depending on local code.
- Full gut renovation: New layout, relocated plumbing, updated electrical, fresh subfloor and walls. Always requires permits and licensed trades in most U.S. jurisdictions.
Use our pre-project clarity checklist to align your goals, budget, and timeline before any money changes hands. Unfamiliar with contractor terminology? The plain-English renovation glossary decodes terms like rough-in (the stage when pipes and wires are run before walls close up) and cement board (rigid tile backer resistant to moisture).
The Correct Sequence of Bathroom Renovation Work
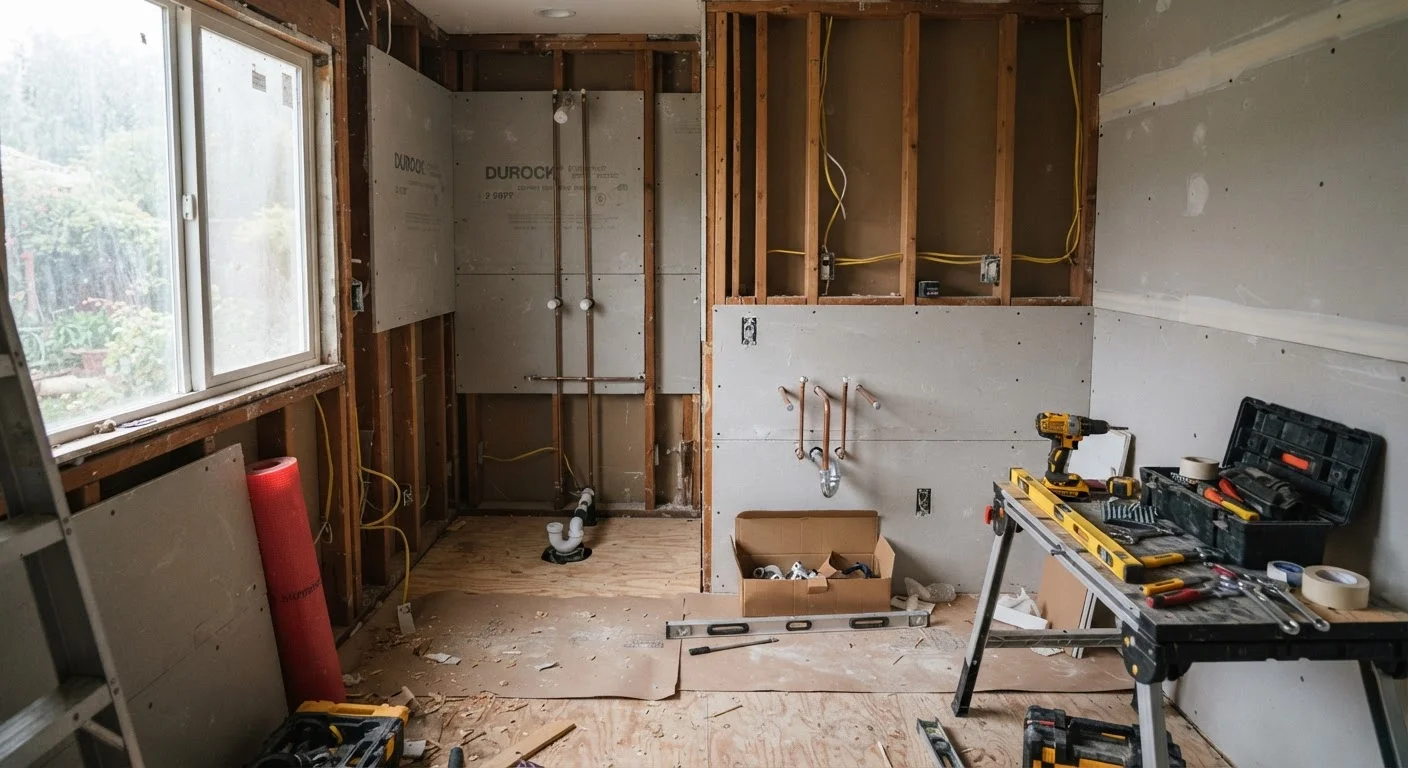
Renovation tasks must follow a specific logic - finish work done before rough-in is complete means tearing things apart twice. Here is the standard sequence for a bathroom gut renovation:
- Demolition - Remove fixtures, tile, drywall, and flooring down to studs and subfloor.
- Structural repairs - Address any rot, sagging joists, or subfloor damage uncovered during demo.
- Rough-in plumbing - A licensed plumber repositions or extends supply lines and drain connections.
- Rough-in electrical - A licensed electrician runs circuits for GFCI outlets (ground fault circuit interrupter - required within a certain distance of water sources), exhaust fan, and lighting.
- Inspections - Rough-in work must typically be inspected and approved before walls close.
- Insulation and backer - Install moisture-resistant insulation and cement board or equivalent tile substrate.
- Waterproofing membrane - Applied to shower and wet-area surfaces before any tile.
- Tile and flooring - Set and grout tile once waterproofing has cured.
- Finish plumbing and electrical - Fixtures, faucets, outlets, and switches are installed.
- Vanity, mirror, accessories - Final cosmetic elements go in last.
For a broader view of how bathroom work fits into whole-home sequencing, see our room-by-room renovation sequence guide.
Order all fixtures and tile before demolition begins - confirm they are in your possession before the first wall comes down.
Supply chain delays are common, and a partially demolished bathroom sitting idle while you wait on backordered tile multiplies your disruption time and costs.
When tiling a shower floor, always dry-lay your tile pattern from the center drain outward before setting a single piece in mortar - adjust cuts at the perimeter, not at the drain.
Awkward slivers of tile at the most visible focal point (the drain) are a hallmark of rushed layout. Planning from the center produces a balanced, professional result.
Waterproofing: The Step Most DIYers Underestimate
More bathroom remodel failures trace back to inadequate waterproofing than any other single factor. Standard drywall - even moisture-resistant varieties - is not a substitute for a proper waterproofing membrane in shower enclosures and wet areas.
Current best practice involves applying a liquid-applied membrane or sheet membrane system over cement board before tile is set. The membrane must extend a minimum height up the walls (check your local building code for the required height), wrap into the floor pan, and seal around all penetrations - niche boxes, showerhead stub-outs, and valve trim plates.
Common waterproofing errors include:
- Using standard drywall or green board (moisture-resistant drywall) as a tile substrate in wet zones
- Skipping membrane at corners, which experience the most movement and cracking
- Not allowing adequate cure time before setting tile
- Failing to pre-slope the shower floor to the drain at the correct pitch - typically about ¼ inch per foot
A failed waterproofing job rarely shows itself immediately. Water migrates slowly through grout joints, and by the time visible mold or soft flooring appears, structural damage may already be significant.
What Surprises Homeowners Most
Even meticulously planned bathroom remodels encounter surprises once walls open. Understanding the most common ones helps you budget for contingencies - a reserve of 15-20% above your base estimate is a widely cited guideline among renovation professionals.
Subfloor and Joist Rot
Toilets, tub surrounds, and shower pans can leak silently for years. When tile and flooring come up, soft or blackened subfloor is one of the most frequent discoveries. Depending on extent, repairs range from patching sections of plywood to sistering (reinforcing alongside) damaged joists - structural work that should be assessed by a qualified contractor.
Outdated Electrical
Older bathrooms often lack GFCI protection, have undersized circuits, or have no dedicated circuit for the exhaust fan. Bringing wiring up to current code is not optional during a permitted remodel - and it adds both time and cost.
Undersized or Missing Exhaust Ventilation
Many bathrooms, especially in homes built before the 1980s, have exhaust fans vented into the attic rather than to the exterior - a moisture problem that breeds mold. A full remodel is the right time to correct the duct path.
Plumbing That Doesn't Match Plans
Actual pipe locations behind walls frequently differ from what's shown on older blueprints, or there may be no documentation at all. This can affect vanity placement, shower valve positioning, and rough-in dimensions for new fixtures.
Test for Asbestos and Lead Before Demolition
Homes built before 1980 may contain asbestos in floor tile, mastic adhesive, or pipe insulation, and lead in paint or solder. Disturbing these materials during demolition creates a serious health hazard. Before any demo work, have a certified inspector test suspect materials. If hazardous materials are confirmed, remediation must be handled by a licensed abatement contractor - this is not a DIY task.
When to DIY and When to Call a Licensed Professional
A bathroom remodel offers genuine opportunities for skilled DIYers - and clear limits that protect safety and code compliance. Knowing where the line is prevents costly mistakes.
Tasks Many Skilled DIYers Tackle
- Demolition (with appropriate safety gear and verified no asbestos/lead in older homes)
- Installing cement board substrate
- Applying waterproofing membrane per manufacturer specifications
- Setting tile and grouting
- Installing vanities, mirrors, towel bars, and accessories
- Painting and caulking
Tasks That Typically Require Licensed Trades
- Plumbing rough-in changes - Moving drain locations or supply lines. Most U.S. jurisdictions require a licensed plumber and permit.
- Electrical panel or circuit work - Adding or upgrading circuits requires a licensed electrician in nearly all U.S. states.
- Structural repairs - Joist sistering, subfloor replacement over large areas, or any load-bearing modifications.
- Gas line work - If the bathroom includes a gas-fired radiant heater, always use a licensed gas fitter.
If you are new to renovation projects, our first-time DIYer guide covers how to evaluate your skill level and when professional help is the smarter investment.
This article provides general home improvement information and education. Always verify local permit requirements with your municipal building department and consult licensed professionals for electrical, plumbing, structural, and gas work.
Realistic Timelines and How to Plan Around Them
One of the most common frustrations in bathroom remodeling is underestimating how long the project will take. A cosmetic refresh might be complete in a weekend; a full gut renovation of a primary bathroom can take four to six weeks when factoring in inspection waits, tile curing time, and trade scheduling.
Key timeline factors include:
- Permit approval: In many municipalities, permit review takes one to three weeks. Apply before scheduling trades.
- Trade availability: Licensed plumbers and electricians are often booked two to four weeks out. Sequence their work early in your planning.
- Material lead times: Specialty tile, custom vanities, and imported fixtures can take four to twelve weeks to arrive. Order before demolition begins.
- Cure and dry times: Waterproofing membranes, mortar beds, and grout all require specific cure windows before the next step. Rushing these stages causes failures.
Plan for your household to be without that bathroom for the full duration. If it is the only full bathroom, either schedule the project in phases or arrange alternative bathing access for the duration of rough-in and tile work - typically the longest phase.
A well-sequenced bathroom remodel is ultimately a project of patience and preparation. The homeowners who finish on budget are those who planned for what they couldn't yet see.